By: Jefferson Webb
 Although my great helm served me faithfully for the better part of a decade, I was starting to look around for another helmet to go along with some upgrades to my harness and gear. As I looked around at the various helmets on the market that are mass-produced, I really did not find anything that I thought would be a good replacement. When I looked at custom helmets from some of the outstanding smiths and forges that exist, the price was just much MUCH more than what I was willing to pay. Some of those custom helms are worth it, but I did not want to, nor could I afford to foot that sort of bill. Part of my issue with my great helm I think came from the human desire to change things up sometimes (like redecorating the house, getting a new house or car…). But my research into a new helm also comes from a knowledge that the great helm (in particular this style) was an earlier helmet and as far as we can tell, did not see much use with a harness of plate armour like the bascinet helmets, sallets, and such did. So, the idea that it would be out of place with my harness was lingering there. That said, as a good friend of mine stated in a conversation recently, “The people depicted in most of the sources in harnesses were royalty or nobility, and were able to afford the most up-to-date and complete harnesses. Others such a lower knights and men-at-arms often had to piece together harnesses and this was not so well depicted.” Something that makes perfect sense, and that I already had lingering in the back of my mind as well. Given this conversation and that fact that my great helm has saved my head and face some pain several times over the span of its service to me, I decided to give it an exterior makeover and continue on with this helm. Since it is historically documented that helms were painted from time to time, why not? I decided to share the basic steps with you.
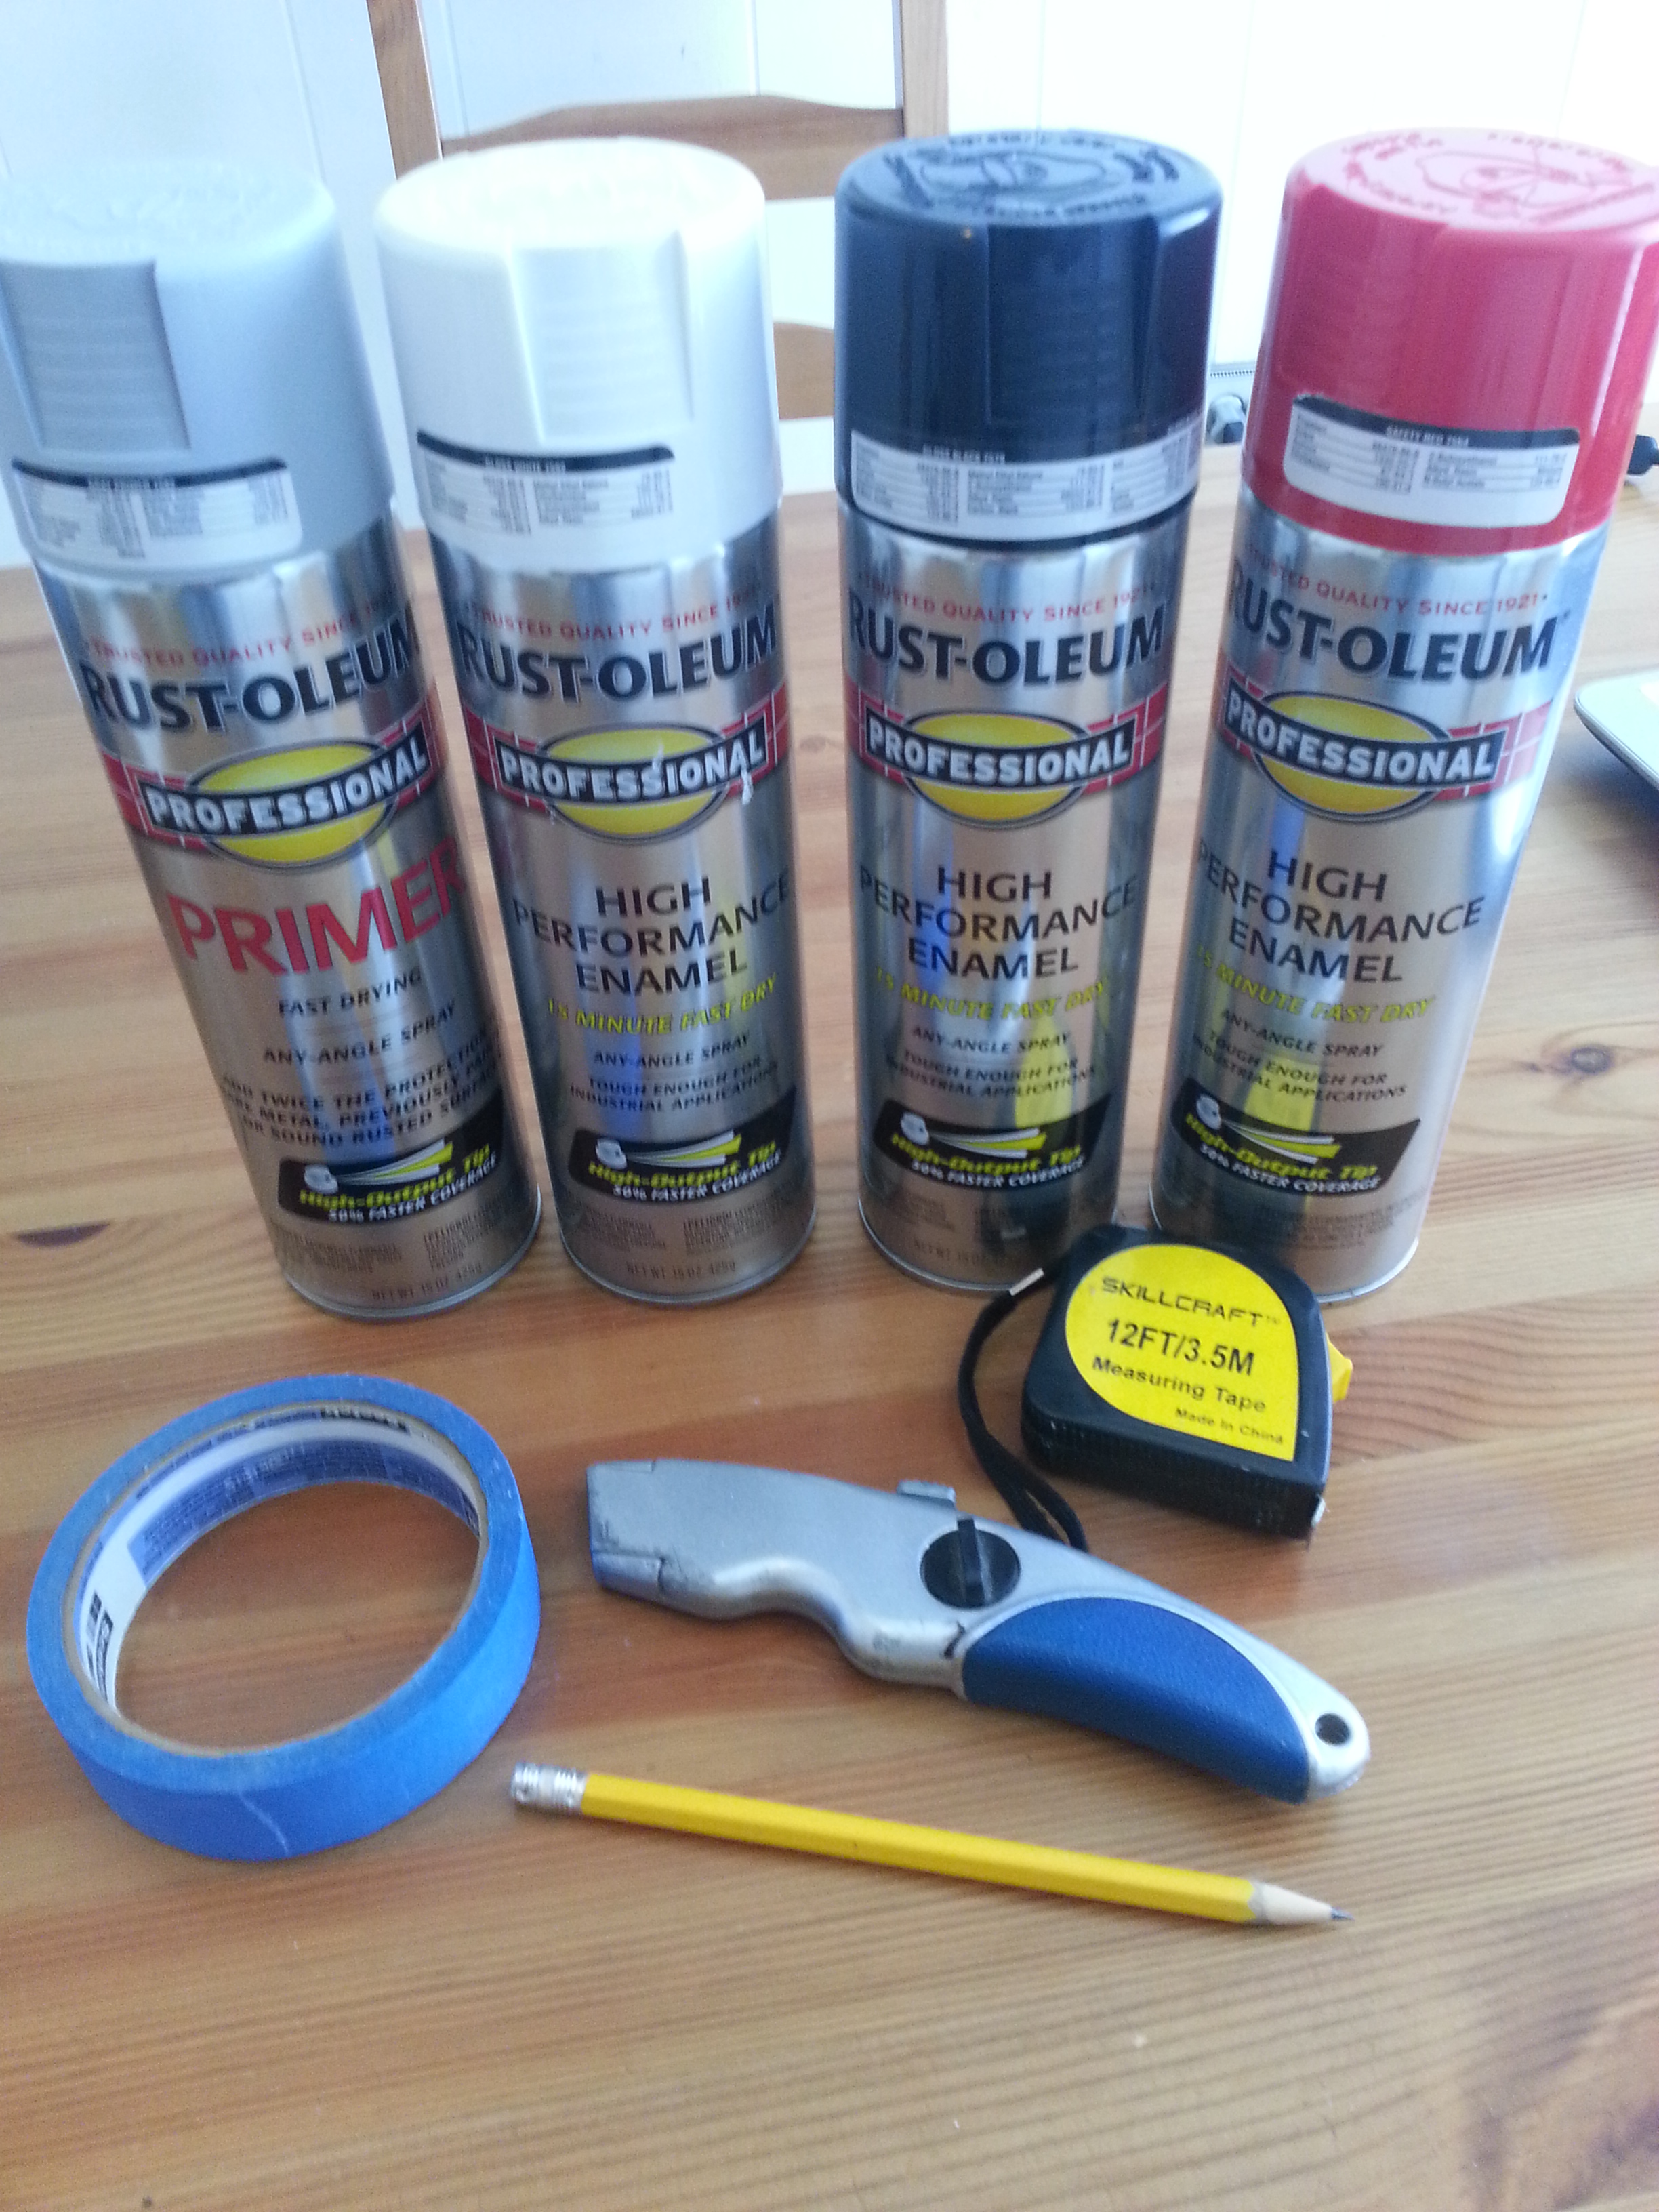 The first thing I did was remove most of the padding from the inside of the helmet, but understand this is probably not a step that you will need to take. I also used paper and tape to close up the eye slot/ocular and the air holes on the face from the inside of the helmet to keep paint from spraying through. The next thing I did was make sure that the exterior was clean of any dust, dirt, etc… Once that was done I took the helmet outside (the weather was very good for painting outside and you want to paint in a well-ventilated area). I purchased some Rust-Oleum Professional High Performance Enamel spray cans for the project. One can of primer and each color desired was more than enough. The can states that the primer and paint dries in 15 minutes, but I’d give it twice that amount of time to dry. Other supplies were a pencil, painter’s tape, a box cutter, and a tape measure.
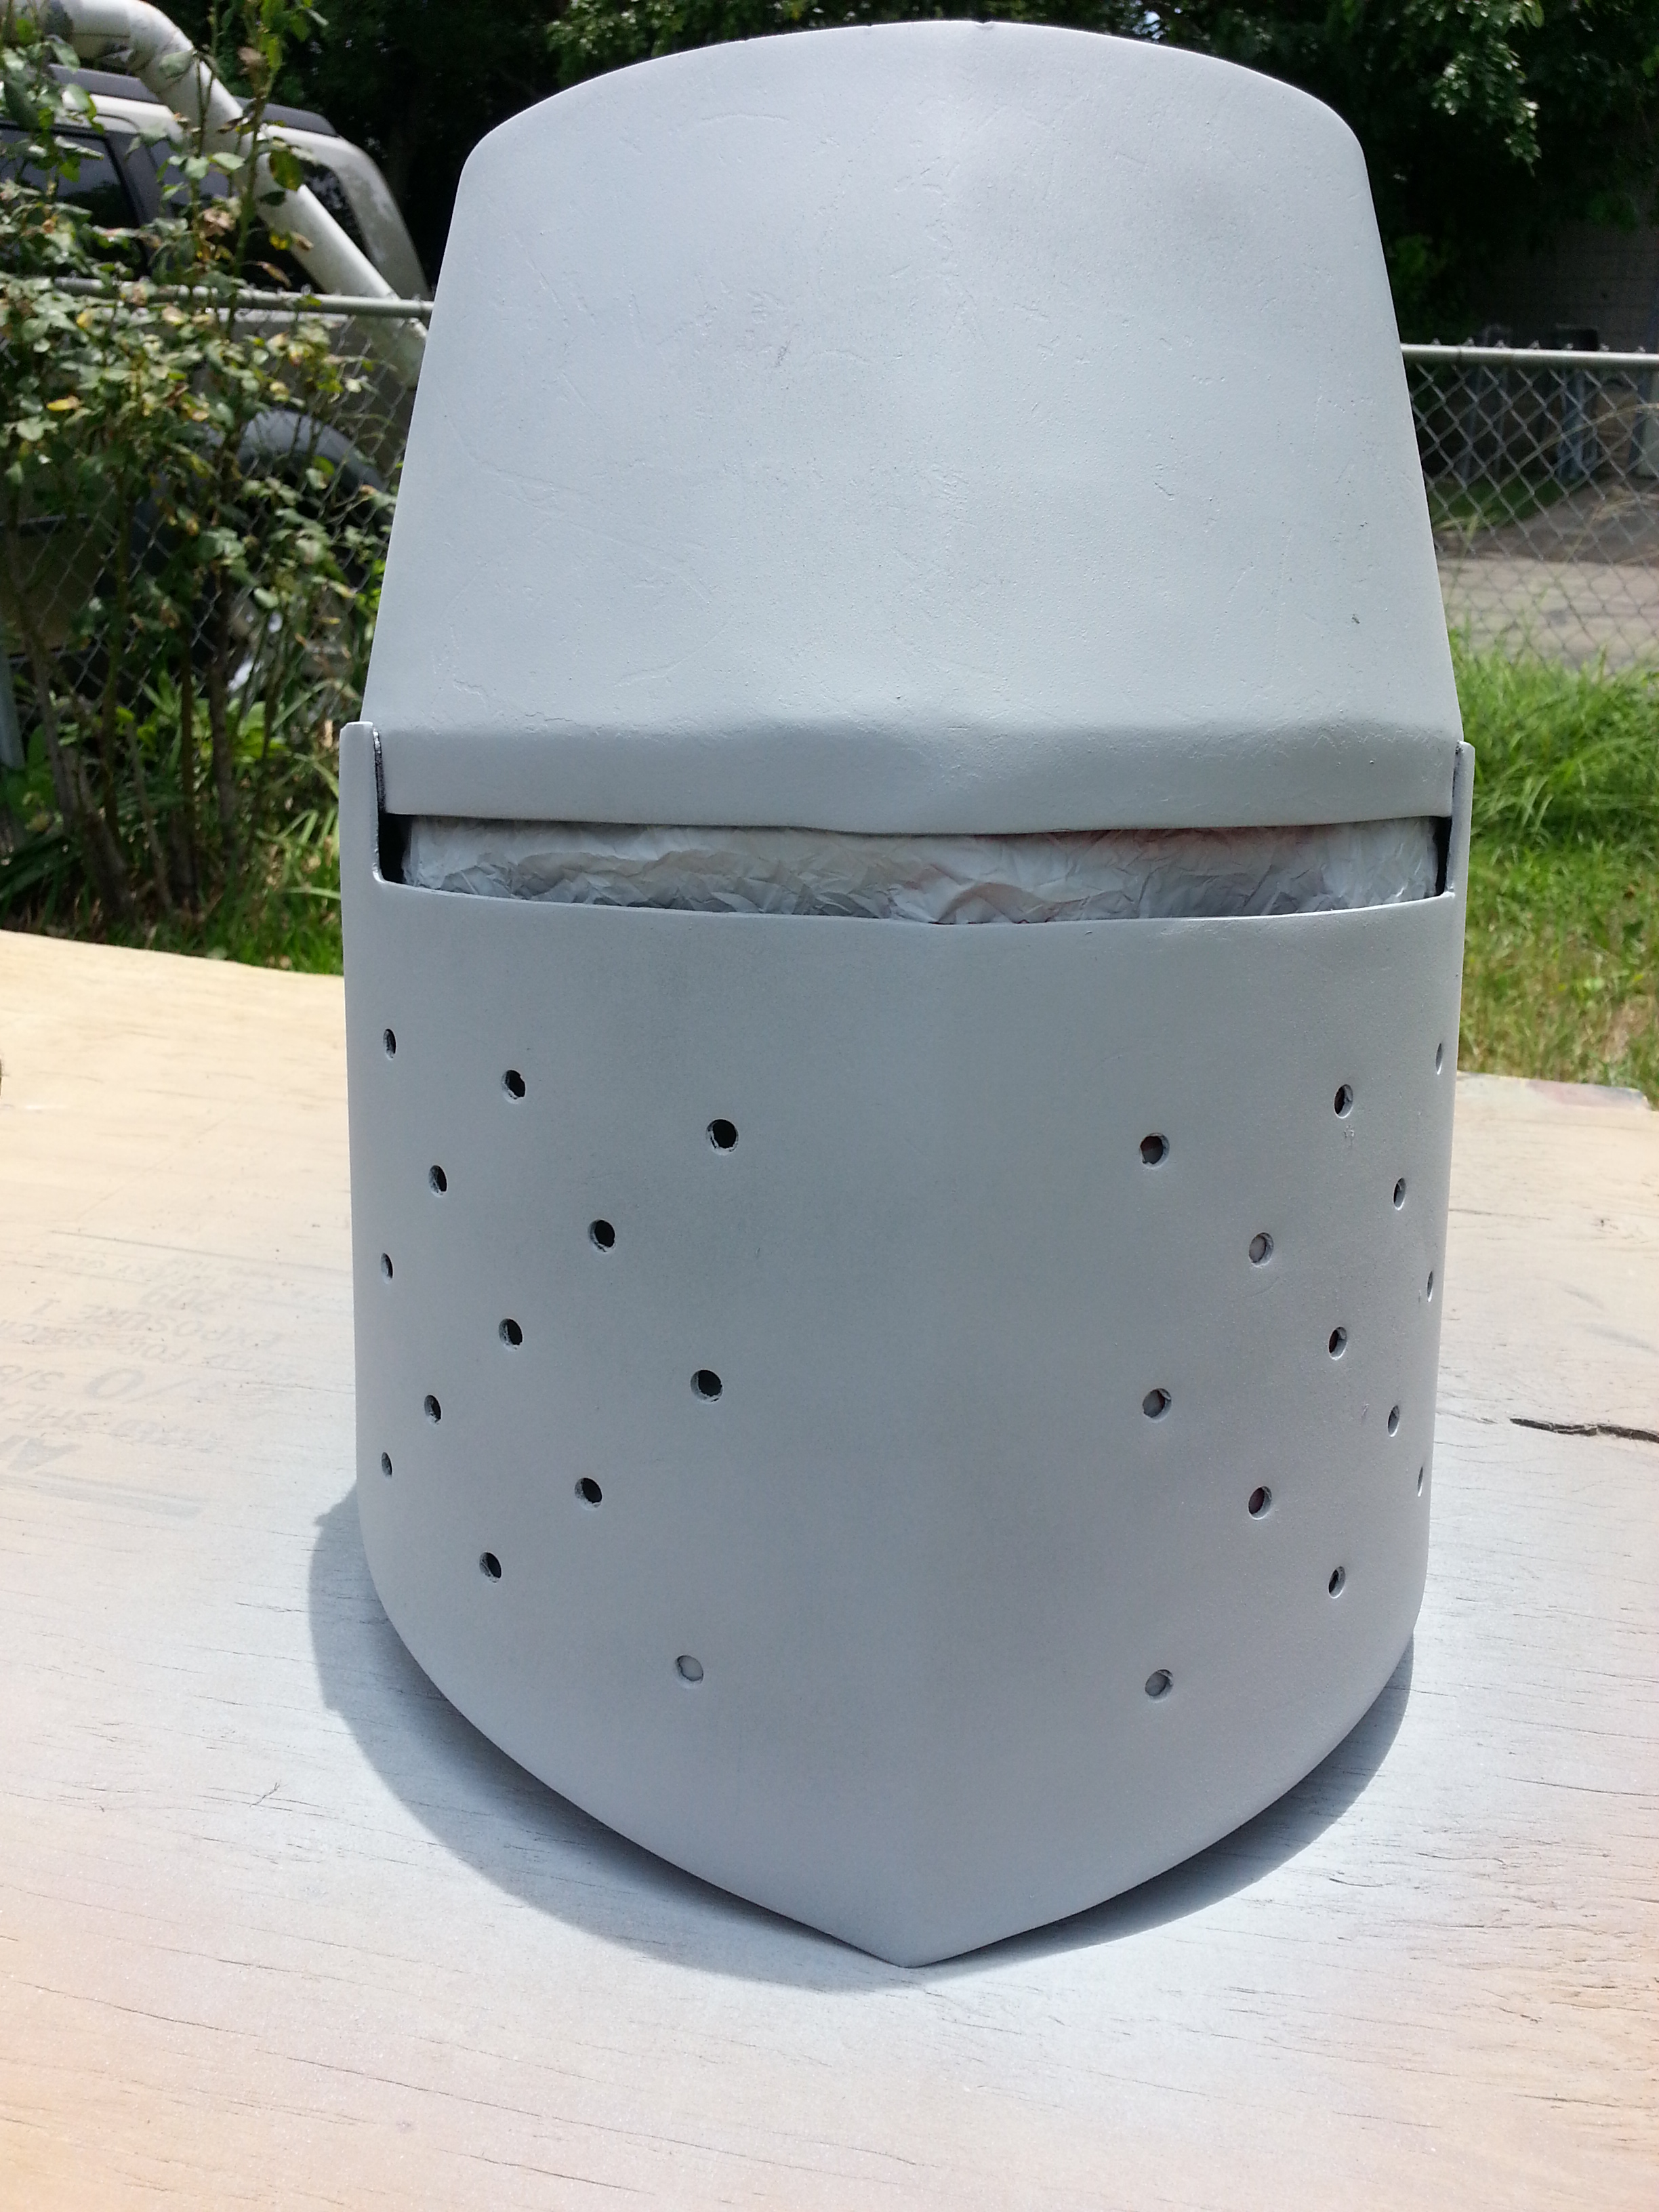
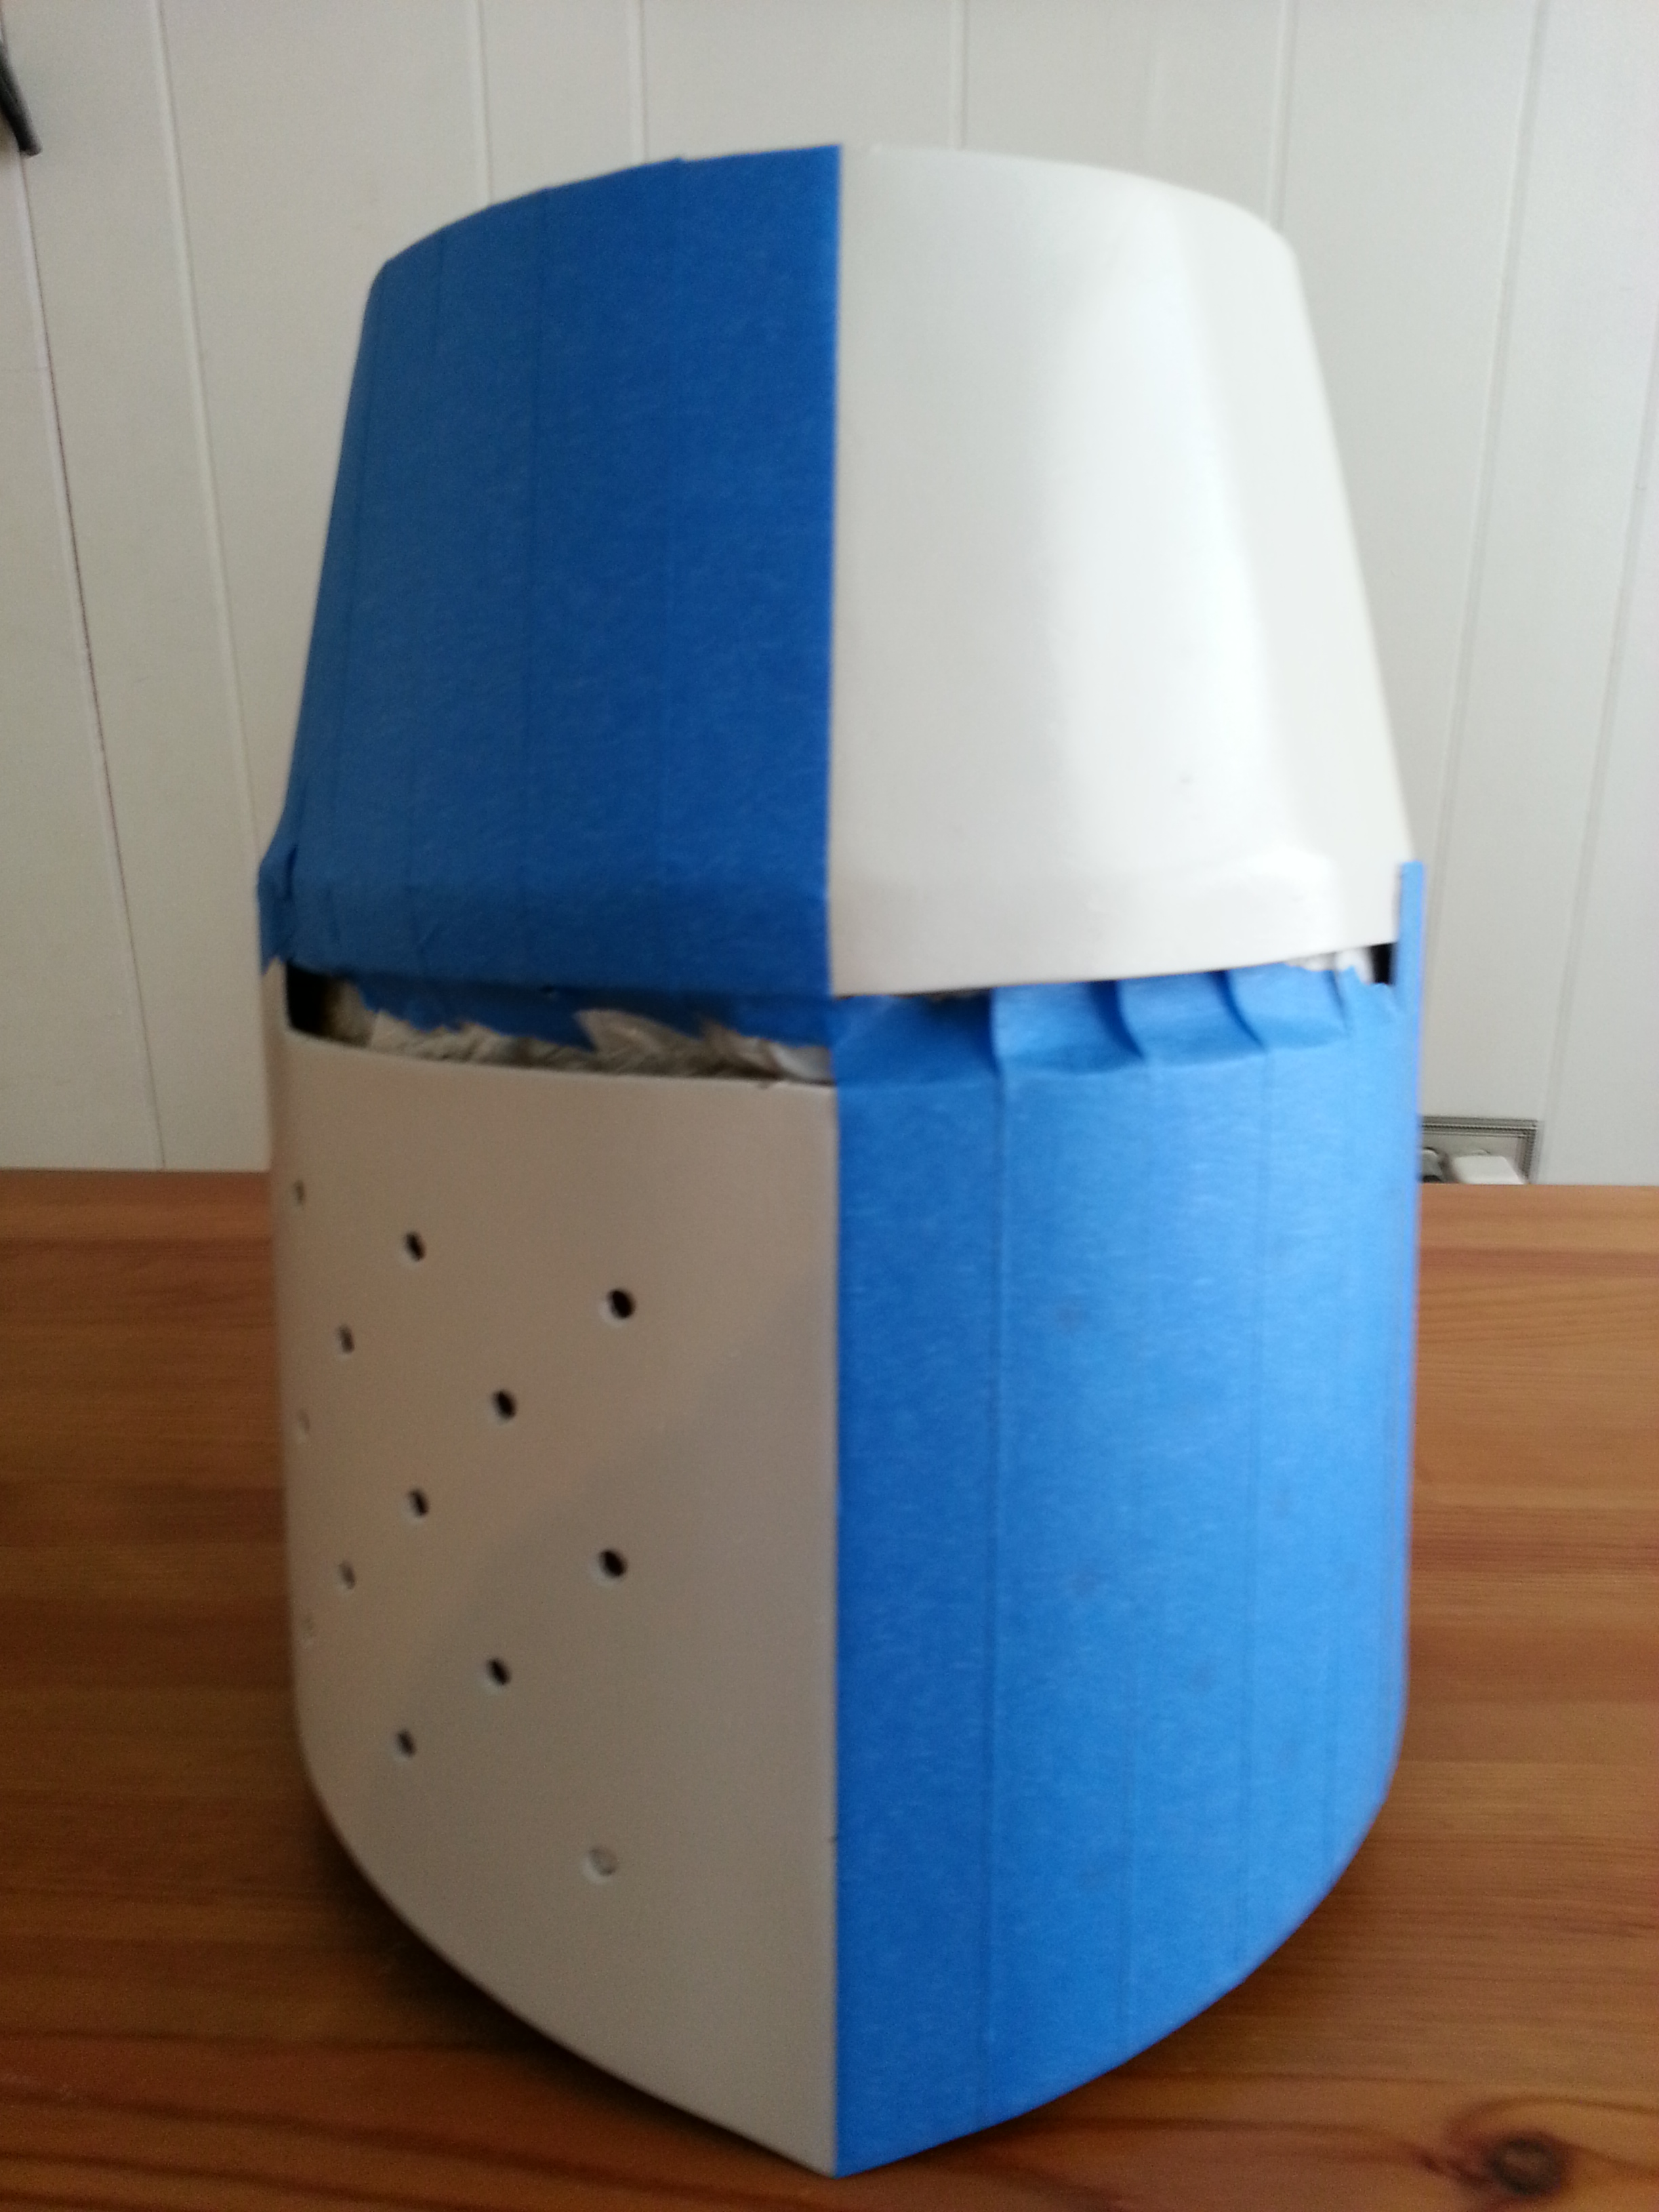
 The design I decided go with was the artwork that is on my shield. I thought it would look sharp for my shield, surcoat and helmet’s paint job to all match. after applying two coats of primer to the entire exterior of the helm, and letting it dry completely, I applied two coats of gloss white paint. Once it dried I took the helm inside and began the task of taping the face to begin creating the checkerboard pattern that I wanted. I taped the areas I wanted th design to be on. Since the tape was one inch wide, I measure off one inch squares on the tape after applying it on the helm. I then used my box cutter to carefully slice the tape without harming the white paint under it. Then I removed some of the squares alternately to create the desired checkerboard pattern. This took some time and was the most tedious part of the project. Once I had the checkerboard ready I taped up the remaining areas of the helmet that I did not want painted black in the next phase of painting. I used the painter’s tape again along with some simple notebook paper to cover the areas as seen in the third picture.

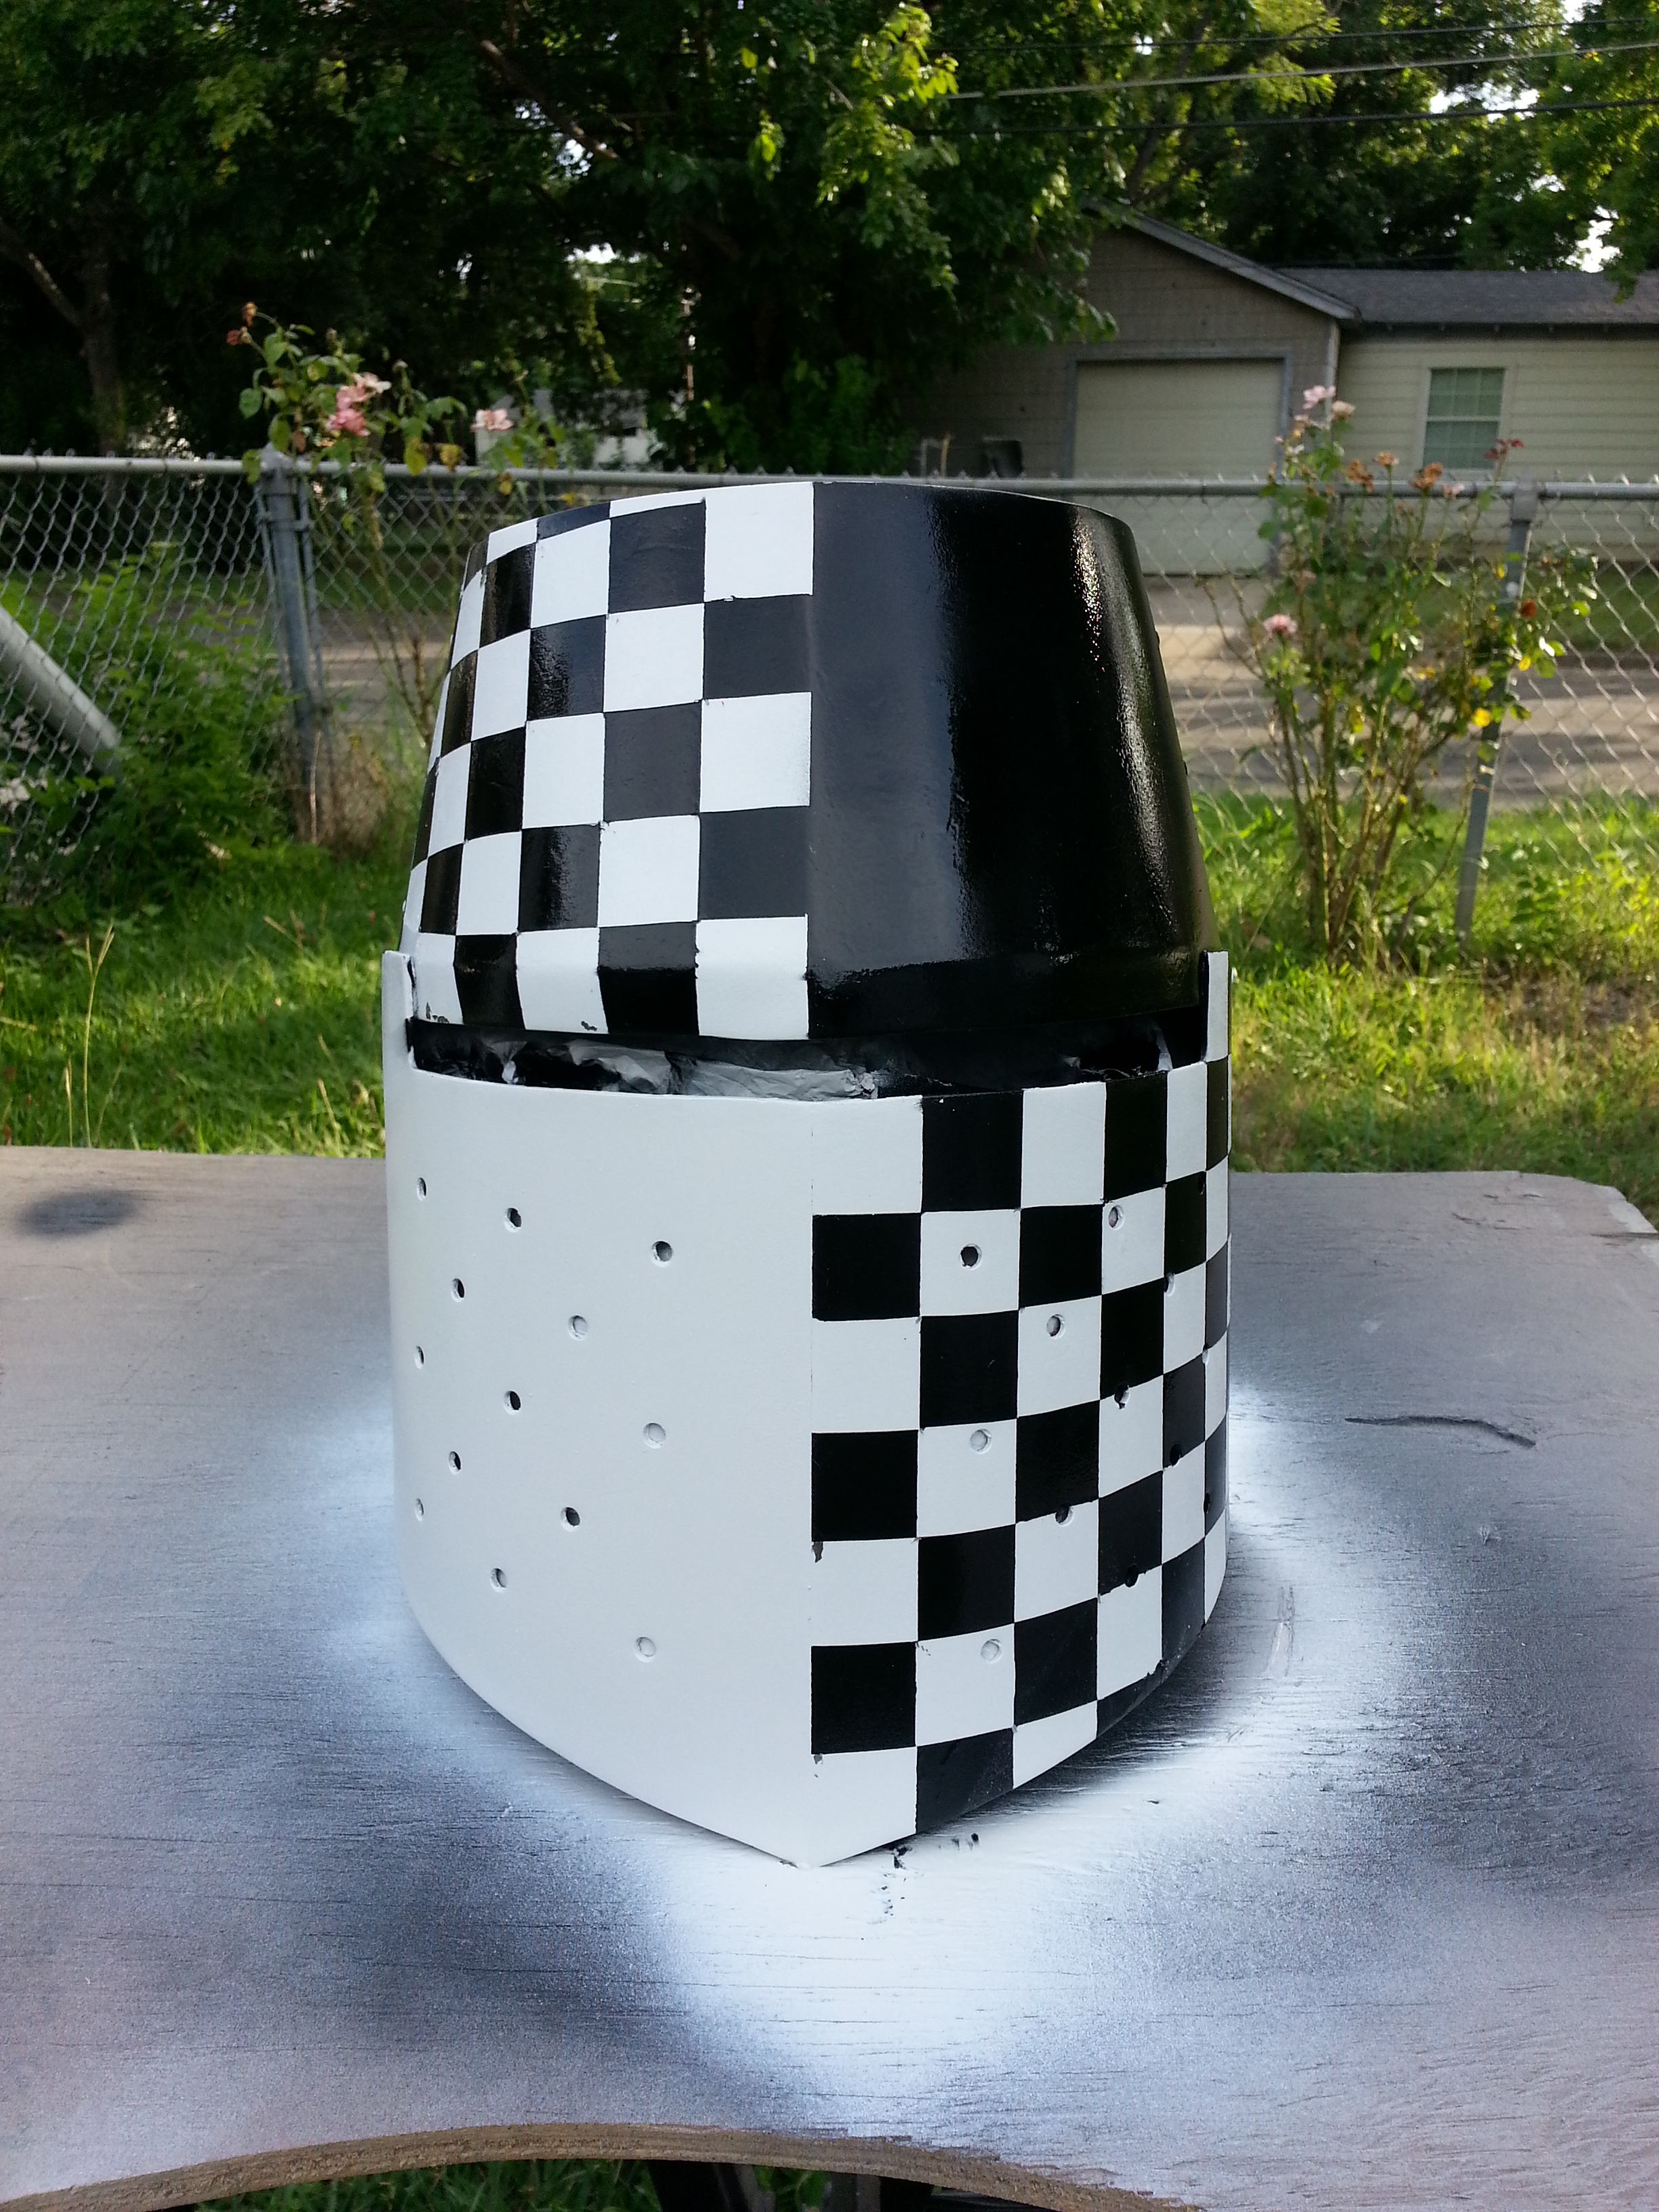
 Next I took the helmet outside and applied two coats of black paint, and once more let it dry completely between each coat. Once the second coat completely dried I very carefully removed the tape and paper to reveal the checkerboard design in the upper right and lower left front of the helm had successfully been completed as well as the upper left area that I wanted to be solid black. The next step was to once more take the helmet back in and measure out the desired dimensions of the cross that I would next paint on the central portion of the helm’s face. Once I got my measurements I carefully applied the tape to the front of the helm to create the area for my cross. Once this was done I used tape and several pieces of paper to cover the rest of the helm to prevent the red paint from getting on any other parts of the helm.

 I applied three coats of red paint this time, again making sure that the paint was completely dry between each application. When it was finished drying, I carefully removed the tape and paper the reveal the completed cross on the front of the great helm. While I have made many custom shields for sale and for personal use to include paint jobs, this was my first attempt at painting a piece of armour, and so there were a few small places that I had to touch-up, but nevertheless the project was a success and was a lot of fun. Furthermore, Instead of spending hundreds of dollars on a new helmet, I spent about $30.00 and a few hours of time, and I have a great looking helmet that I hope will serve me for yet another decade.
